
Bay Local Control Cabinet
A local control cabinet (LCC) is commonly installed at each bay location to house the wiring of the GIS bay circuits and connect it to the substation control room. The LCC comprises a mimic diagram, switches, indicators, and annunciator interlocks, and while it is not typically seen as a GIS component, it does have control over its operation.
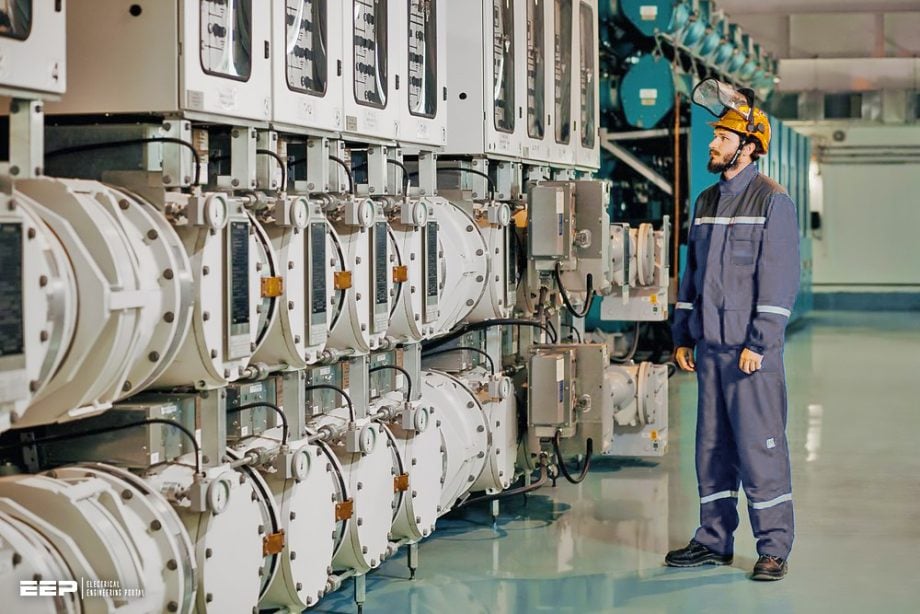 The Brain of a Gas-Insulated Switchgear (GIS): The Bay Local Control Cabinet (LCC)
Provisions for regulating and overseeing substation equipment can be categorized as either local, meaning they are located within the substation, or remote, meaning they are positioned elsewhere, typically in an operation center. Given that the majority of switches are often motor powered, GIS (Gas-Insulated Switchgear) can provide a wider range of choices and functionalities for control compared to other systems.
However, in Gas-Insulated Switchgear, these functions are consolidated into a Local Control Cabinet (LCC) and must be seamlessly incorporated into the customer’s pre-existing automation system.
Due to its compact and distinctive appearance, GIS equipment limits the user’s choices when it comes to selecting components such as switches, terminal blocks, and indicator lights for usage within the equipment. The only exception to this is the local control cabinet (LCC) or marshalling box (MB), which serves as the recognized point of connection between the utility and GIS equipment.
The user might choose to install control or monitoring devices inside the cabinet or utilize the enclosure just as a wiring marshalling point.
Additionally, the Local Control Center (LCC) may include indicator lights on a mimic board to aid operations people. If the LCC (Local Control Cabinet) is situated far away from the control house or protective relay installation, it is possible to install operational switches in order to reduce the distance that operators need to go.
In short, these are the topics that will be discussed in this article.
- LCC Access and Layout Requirements (Integrated or Free Standing LCCs?)
- LCC Physical Requirements
- RTU & Station Control System (SCS) LCC Applications
- Control Wiring and Marshalling
- Local Metering
- Fault Signaling
- Additional Requirements For LCC
- Interlocking
- BONUS 🔗 Power Engineering Handbook (PDF): From Generation to Transmission and Distribution of Electric Energy
1. LCC Access and Layout Requirements
Integrated or Free Standing LCCs?
It is usually required that the switchgear in each bay of the GIS transmission substations be locally controlled at the GIS switchgear by its own specific bay local control cabinet (LCC), which should be positioned in close proximity to the switchgear and preferably integrated within the GIS switchgear, as depicted in Figure 1.
It is necessary to have LCCs in order to conduct local plant operations during the commissioning, testing, and maintenance phases. This applies for both RTU and Station Control System (SCS) applications.
A representation of LCCs that are integrated with GIS switchgear is shown in Figure 1.
Figure 1 – LCCs integrated in GIS switchgear

When freestanding LCCs are put in the opposite direction of the GIS switchgear, the LCCs will now become the operational viewpoint. They will be configured in such a way that the LCCs on the left have odd bay numbers, while the LCCs on the right have even bay numbers.
Take note that the LCCs that are coupled with the GIS must be situated precisely opposite the switchgear, as depicted in Figure 2.
Figure 2 – An example of free sanding LCCs in front of GIS switchgear

2. LCC Physical Requirements
With respect to the ground level, the LCCs should to be located at a height that is lower than 1800 millimeters. At the back of the cabinet, on gland plates, the cabinets need to be positioned in such a way that they can accommodate control wires coming from the switchgear. There is the possibility of the cabinet having a swing frame, with the door opening to the left side and expanding outwards.
The front of the cabinet is typically where all points of control, including AC, DC, and VT MCBs, are installed. This is done to facilitate operation and inspection without the need to enter the cabinet itself; however, there are a other alternate configurations that can be utilized.
Labeling removable gland plates with permanent labels that show the Safe Working Load that the plate is capable of bearing is one of the recommended practices. It is the responsibility of the customer to ensure that the points of electrical control on the LCC are not situated lower than 1800 millimeters above the floor level.
This is because the LCCs should be mounted independently and opposite the switchgear. The operational control should be designed in such a way that this is the case.
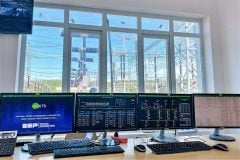
Figure 3 – An example of a Local Control Cabinet for RTU application

3. Application Of RTU & Substation Control System LCC
In the case of RTU stations, a mimic diagram that depicts each individual bay is required to include the necessary operational control and position indications of all HV plant on the LCC. This representation must also include VT symbols. When it comes to stations that are part of the Substation Control System, a single Bay Control Unit (BCU) is installed in the bay-specific LCC. The LCD HMI mimic is responsible for providing control over the BCU.
It is required that the LCC mimic be constructed with clear positioning and labeling of control switches and semaphores, with the standard ESBN plant designations being used exclusively in accordance with the project-specific single-line diagram (SLD) and signals list. The installation of IEC designations on LCCs is strictly prohibited.
As depicted in the Figure 3 above, the “A” busbar must always be displayed on top of the “B” busbar in stations that have two busbars operating simultaneously.
Figure 4 – LCC for a station control system (SCS) application

3.1 LCC Control Switches & Control On/Off Switches
In order to ensure that all circuit breakers, disconnectors, and earth switches (both maintenance and high-speed) are under operational control, the LCC mimic must be equipped with illuminated control and discrepancy type switches. This is only applicable for RTU applications. It is required that these operational control switches be situated in close proximity to the HV plant symbol that corresponds to them on the LCC mimic (as shown by the red dotted box in Figure 3).
LCD Human Machine Interface (HMI) mimics are used to provide operational control of the high-voltage facility for Station Control System (SCS) applications.
When the client is given with separate motors for disconnectors and maintenance earth switches, the customer is required to install separate control switches, which include both on and off switches. Position indication of the Control On/Off switches must be ganged in series for each bay in order to give NCC with position indication of the status of the remote control.
It is required that the National Control Centre (NCC) be provided with Double Point Status Indications in the event that one or more of the switches are in the “Off” state. These indications will be further detailed in the signal list that is particular to the project.
Figure 5 – Outline Arrangement of LCC

3.2 Local/Remote Control Key Switch
Additionally, the LCC Local/Remote Control Key Switch is applicable to GIS transmission substations that are controlled by either RTU or Station Control System (SCS). In order to enable the selection of either a local or remote control, the LCC must be equipped with a key switch that is specifically designated for each bay. It is required that this key switch be equipped with the capability to attach a hold-off notice by means of a cable tie or another similar fastening.
The staff who are working on high-voltage equipment are provided with this switch as a final precautionary measure, with the understanding that all remote commands have been stopped and that the equipment is safe to carry out commissioning, testing, or maintenance.
Operating the switch in such a way that, when in the Remote position (Normal Operation), operation control can only be accomplished remotely through the Station Control Cabinet, hence restricting operation control from the LCC, is the manner in which the switch should work.
Figure 6 – Local/Remote switch in a Local Control Cabinet (LCC)

3.3 Earth Unlock Key Switch
In RTU stations, a specialized key switch is installed on the LCCs (Local Control Centers) for Feeder Earth Switches and Customer Transformer Earth Switches, as specified in the project’s interlocking standard. The dedicated earth unlock key switches are installed on the Station Control Cabinets/Mimics as well.
This key-switch is intended to serve as an extra precautionary measure for operators to pause and reconsider before activating an earth switch. It is important to note that Station Control System LCCs do not require a specific earth unlock key switch.
The system’s inherent command logic offers sufficient protection for Station Control System (SCS) applications. If the system necessitates the operator to undergo a two or three step choice process in order to operate the earth switch, this is considered to offer an equal level of protection.
Recommended – Experience matters. Premium membership gives you an opportunity to study specialized technical articles, online video courses, electrical engineering guides, and papers written by experienced electrical engineers.
4. Control Wiring And Marshalling
Installation of EMC-shielded control cabling, which must be black in color, is required between the switchgear and LCCs. The control cable shall be delivered in pre-cut lengths and either be pre-terminated on the switchgear or have plug and socket systems to enable easy plug-in connection to the switchgear. This does not include the circuit wiring for CT and VT.
All secondary connections of current and voltage transformers, as well as controls, alarms, indicators, AC and DC supplies, must be wired to designated terminals.
The specified terminal type for the file should be as follows:
- Terminals for CT secondary circuits (for example Phoenix UGSK/S and URTK/SP)
- Terminals for VT secondary circuits (for example Phoenix URTK/S)
Figure 7 – PT bay front view diagram

The customer is required to provide drawings that clearly indicate the physical arrangements of the proposed cabinets, including the placement of all terminals, devices, and trunking size. PVC trunking equipped with PVC coverings must be utilized within the LCC.
The trunking should be dimensioned to support all the wire, with ample spare capacity for future wiring additions.
Special attention must be given to the design of busbar and interlocking schemes to guarantee that they can accommodate the future expansion of GIS development. The terminals and connections must be designed to allow for the disconnection, bypass, and removal of a bay and its associated LCC without causing any interruptions to the secondary control systems and the operation of adjacent LCCs.
The LCC wiring for the extension should include disconnector type connections on important circuits to ensure minimal disruption. This means that the interlocking and busbar protection connected with the initial GIS development will not be disabled.
Figure 8 – PT bay front view diagram

5. Local Metering
Each bay in the RTU applications must have a Voltmeter and Ammeter at the LCC to indicate the line voltage and current of each feeder and transformer outlet. The recommended terminals for connecting the ammeter are URTK/SP type, specifically the Test disconnect terminal block.
In the context of Station Control System (SCS) applications, it is necessary to ensure that the local metering is accessible within the BCU (Bay Control Unit) on the LCC (Local Control Center).
Figure 9 – URTK/SP – Test disconnect terminal block (with slide, nominal voltage: 500 V, nominal current: 41 A, connection method: Screw connection, Rated cross section: 6 mm2, cross section: 0.5 mm2 – 10 mm2)

6. Fault Signaling
Furthermore, apart from any alarm and display of switchgear faults available on-site, every fault device must be equipped with a voltage-free normally closed (NC) contact.
This contact should be connected to terminals that can be connected to the substation signal system.
7. Additional Requirements
Every cabinet must have fixed lamps equipped with door switches, cubicle heating and 230 V AC anti-condensation heaters. The most favored approach for wiring (excluding CT & VT circuit wiring) is to use a pre-wired plug and socket setup.
Figure 10 – Wiring diagram of a LCC heating, illumination and heating of HV equipment

8. Swichgear Interlocking
The interlocking conditions are specifically designed to prohibit the operation of disconnectors when under load and the activation of earthing switches onto a circuit that is locally energized. A fail-safe interlocking mechanism must be built to ensure that the failure of any component does not result in unintended operation. It is necessary to utilize primary connections from the high voltage switchgear in order to indicate the position for the interlocking scheme.
If auxiliary relays are included in the interlocking scheme, they must be operated in a fail-safe manner.
The initial stages of the interlocking design should be future-proofed to minimize damage to current interlocking circuits when expanding the system for future bays. Future bay busbar disconnect interlocking connection circumstances should be developed to minimize alterations to existing interlocking circuits in the active stations.
Figure 11 – An example of a feeder interlocking conditions

9. BONUS! Power Engineering Handbook (PDF)
Download Power Engineering Handbook (PDF): From Generation to Transmission and Distribution of Electric Energy (PDF, 34.4 MB) (for premium members only):
References:
- Gas-Insulated Substations (GIS) in a Nutshell by H. Koch
- 110/220/400 kV Gas Insulated Switchgear (GIS) Connected to the Transmission System Report
- Switchgears book by BHEL – Bharat Heavy Electricals Limited
- Manual on Power System Protection by CBIP
- Gas-insulated switchgear up to 550 kV, 63 kA, 5000 A, Type 8DQ1 – SIEMENS
Related electrical guides & articles


Edvard Csanyi
Hi, I'm an electrical engineer, programmer and founder of EEP - Electrical Engineering Portal. I worked twelve years at Schneider Electric in the position of technical support for low- and medium-voltage projects and the design of busbar trunking systems.I'm highly specialized in the design of LV/MV switchgear and low-voltage, high-power busbar trunking (<6300A) in substations, commercial buildings and industry facilities. I'm also a professional in AutoCAD programming.
Profile: Edvard Csanyi

Very educational, am really benefiting from this site.
I’am E&I Engineer iterested tour your information about ssub station high and medium voltage FS6 gas circuit breaker specialy in pre commissioning of gas cb.first the procedure FS6 charging and specification of charging, filling of sf6 gas
Respectfully your’s
Fernando Mendoza